


Coal Mine Anti-Backflow Air Door for Belt Roadway
Price:
¥1560
/㎡
Other Products


Description
Additional Information
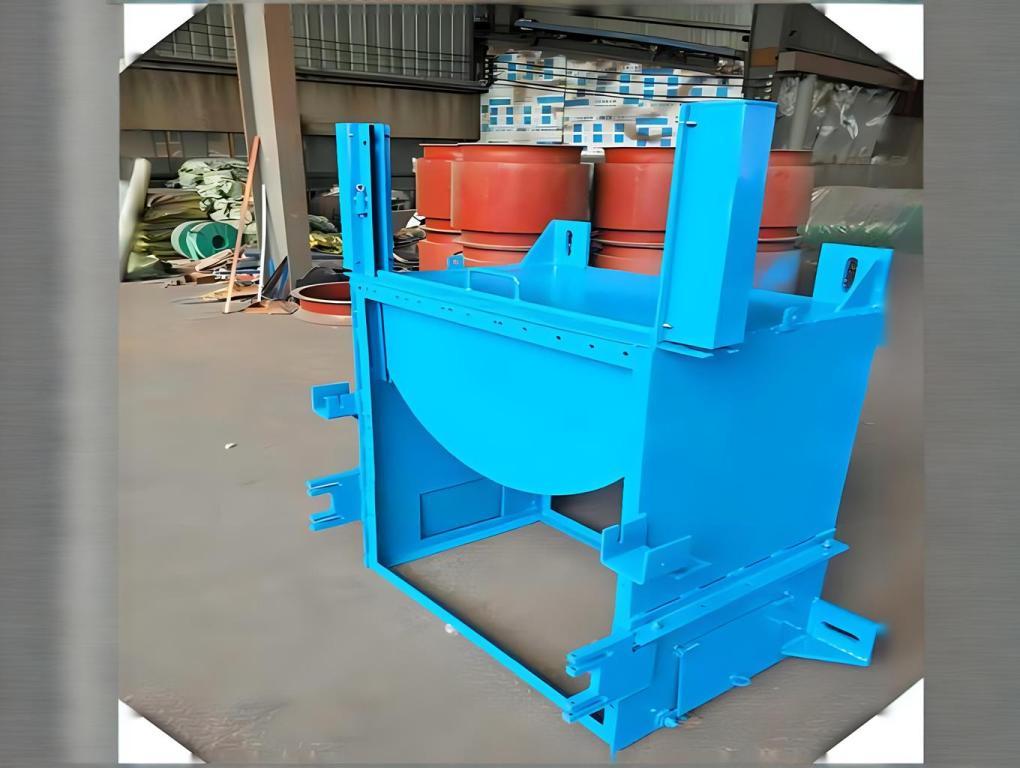
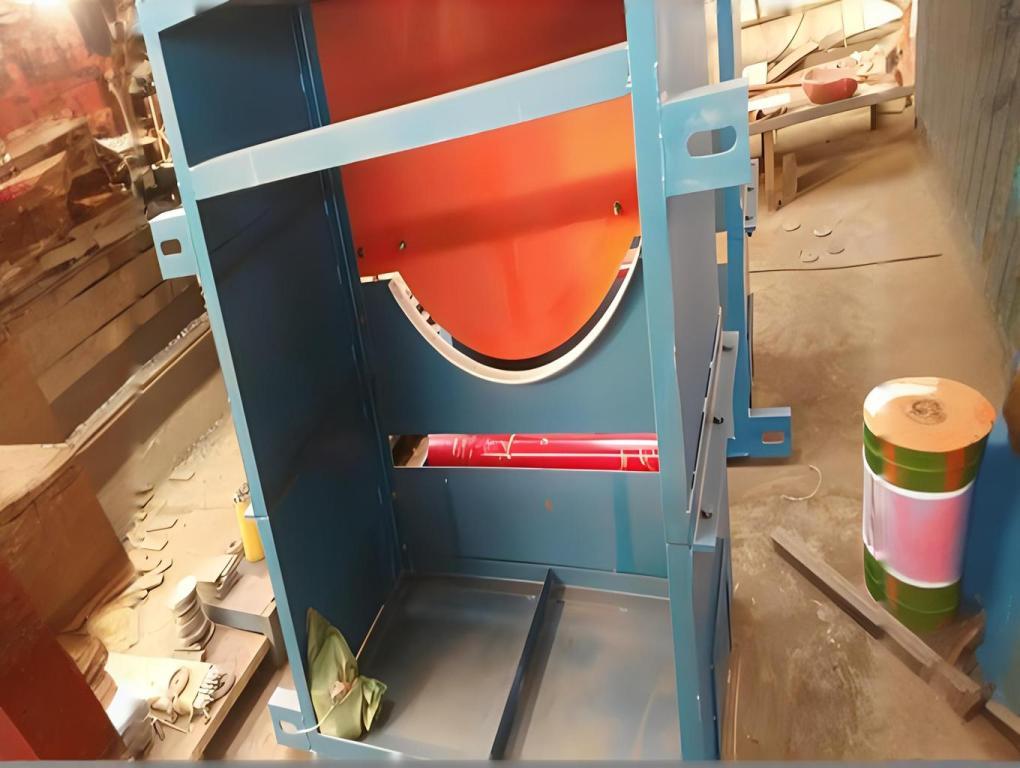
Installation Process of Sealing Chamber Assembly for Mine Belt Conveyor Anti-Backflow Device at Air Doors
The sealing chamber assembly is the core structure of the anti-backflow device, and its installation quality directly affects the sealing effect and equipment stability. Installation must consider the belt conveyor's operating parameters, air door structure, and tunnel environment, adhering to the principles of precise positioning, secure fastening, and tight sealing. The specific process is as follows:
The sealing chamber assembly is the core structure of the anti-backflow device, and its installation quality directly affects the sealing effect and equipment stability. Installation must consider the belt conveyor's operating parameters, air door structure, and tunnel environment, adhering to the principles of precise positioning, secure fastening, and tight sealing. The specific process is as follows:
I. Pre-Installation Preparation
1. Site Survey and Parameter Confirmation
- Measure the belt conveyor's width, thickness, and operating trajectory (including maximum vibration offset). Record the distance between the belt surface and the tunnel wall or air door frame to ensure the sealing chamber dimensions match the belt conveyor.
- Check the structural strength of the tunnel wall or door frame at the installation location. Confirm the load-bearing capacity of fixing points (e.g., embedded parts, bolt holes) to prevent loosening due to vibration after installation.
- Clear dust, debris, and obstacles from the installation area to ensure no structural interference between the chamber assembly, belt conveyor, and air door. Reserve operational space for air door opening/closing and equipment maintenance.
2. Equipment Inspection and Component Inventory
- Verify that the model and dimensions of the sealing chamber assembly match the design drawings. Check the frame structure for deformation or cracks, and ensure the anti-corrosion coating on the chamber surface is intact.
- Inventory flexible sealing components (e.g., rubber strips, canvas curtains), fastening bolts, washers, sealant, and other accessories to ensure none are missing or damaged. Wear-resistant lining plates and other vulnerable parts should be kept as spares.
II. Core Installation Steps
1. Chamber Frame Positioning and Fixing
- Determine the installation centerline of the sealing chamber based on the belt conveyor's operating center axis to ensure concentric alignment. Avoid unilateral offset that could cause uneven force on the sealing components.
- Hoist or lift the chamber frame to the preset position. Adjust the level and verticality (using a level or plumb line for calibration). Leave a 5-10 cm gap between the top of the frame and the tunnel roof or air door beam for future maintenance.
- Secure the frame to the tunnel wall or air door frame using expansion bolts or embedded steel plates. Bolt spacing should not exceed 50 cm. After tightening, check the frame's stability to ensure no shaking (no significant displacement when pushing the frame firmly).
2. Flexible Sealing Component Installation
- Install flexible sealing components on the inner side of the chamber frame along the belt's operating direction: Align the edges of the sealing components with the pre-set slots or bolt holes on the frame. Fix them using self-tapping screws or clips, with spacing controlled at 30-40 cm to ensure the sealing components are flat and wrinkle-free.
- Adjust the contact between the sealing components and the belt surface: The lower end of the sealing components should lightly contact the belt surface (contact pressure should not hinder belt operation; a slight resistance when pushing by hand is acceptable). Avoid excessive gaps that could cause sealing failure or excessive pressure that accelerates wear.
- Reinforce the seams of the sealing components: If the sealing components are insufficient in length and require splicing, overlap the seams by 5-10 cm and secure them with sealant or stainless steel strips to prevent airflow leakage.
3. Auxiliary Installation of Follow-Up Mechanism (If Equipped)
- For follow-up mechanisms with spring-compressed sealing plates or rolling sealing wheels, first fix the mechanism base to the inner side of the chamber frame. Align the base position with the belt's centerline to ensure the follow-up direction matches the belt's vibration direction.
- Install elastic components (e.g., springs, hydraulic rods) and adjust the preload: Control the elastic pressure by adjusting nuts or washers to ensure the sealing wheel/plate always contacts the belt surface and can flexibly follow during belt vibration (manually moving the follow-up component should show no jamming).
- Install guide wheels or limit blocks: Add guide wheels on both sides of the follow-up mechanism to restrict lateral offset. Maintain a 5-10 mm gap between the limit blocks and the follow-up components to avoid structural damage from excessive displacement.
III. Post-Installation Debugging and Acceptance
1. Static Inspection
- Check that all fastening bolts are tightened and sealing components are secure without loosening or detachment. Fill gaps between the frame and tunnel wall with fire-resistant sealant to prevent airflow leakage from the frame's exterior.
- Manually push the sealing components and follow-up mechanism to confirm smooth movement without jamming or abnormal noise. Ensure no sharp protrusions at the contact points with the belt to avoid belt damage.
2. Dynamic Testing
- Start the belt conveyor for no-load operation. Observe whether the sealing components follow the belt's slight vibration and maintain contact without local lifting or detachment. After 30 minutes of operation, stop the conveyor and check the sealing components for wear, ensuring no significant scratches or overheating signs.
- Simulate air door opening and closing actions to check for no structural interference between the chamber frame and the air door. Ensure the sealing chamber fully covers the belt entry area after the air door is closed, with no obvious gaps.
3. Acceptance Criteria
- During belt conveyor operation, use smoke tests or anemometers to detect airflow around the chamber; there should be no significant airflow.
- The follow-up mechanism should respond sensitively, maintaining sealing contact during belt vibration and offset.
- The frame should be securely fixed with no abnormal noise or resonance during operation.
IV. Precautions
- Installation must be synchronized with belt conveyor shutdown. Set up safety warning signs to prevent accidental equipment startup and safety risks.
- The material of the sealing components must be compatible with the belt conveyor's belt material (e.g., avoid contact between rubber seals and oily belts) to prevent chemical corrosion and aging of the seals.
- For belt conveyors in inclined tunnels, install the chamber frame with a 5°-10° downward tilt to prevent dust accumulation at the bottom of the chamber, which could affect sealing performance.
Through standardized positioning, fixing, and debugging processes, the sealing chamber assembly can achieve precise adaptation to the belt conveyor, laying the foundation for the long-term stable operation of the anti-backflow device.
- Installation must be synchronized with belt conveyor shutdown. Set up safety warning signs to prevent accidental equipment startup and safety risks.
- The material of the sealing components must be compatible with the belt conveyor's belt material (e.g., avoid contact between rubber seals and oily belts) to prevent chemical corrosion and aging of the seals.
- For belt conveyors in inclined tunnels, install the chamber frame with a 5°-10° downward tilt to prevent dust accumulation at the bottom of the chamber, which could affect sealing performance.
Through standardized positioning, fixing, and debugging processes, the sealing chamber assembly can achieve precise adaptation to the belt conveyor, laying the foundation for the long-term stable operation of the anti-backflow device.
| Industry Category | Metallurgy & Minerals/Mineral Resources/Mining Ventilation & Dust Removal Equipment |
|---|---|
| Product Category | |
| Brand: | 顺鑫 |
| Spec: | 煤矿用皮带巷防逆流风门 |
| Manufacturer: | 山东 |
| Origin: | 113709 |


